December 26, 2004
Fun with Photoshop Elements 3
I made the mistake of searching for free plugins for Photoshop Elements, and ended up finding a link to a free 30-day trial of Photoshop Elements 3. So for the last several hours I've been screwing around with the assorted filters and effects that the program includes ... and I am so going to have to upgrade to version 3 when my free trial is over, if for no other reason than that this version allows you to toggle through all of the 100+ filters/effects while seeing them applied to your photo (rather than having to access each filter/effect manually).
Here's some of the stuff I've been experimenting on:
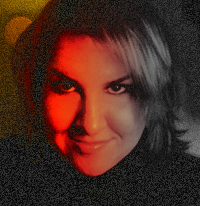
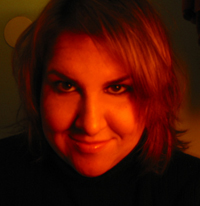 | This is the source photo, taken at about 3:30 a.m. on Dec. 23. This is me after spending many hours drinking with Ian and his brother. I am very drubnk, so I'm sitting on the floor in the doorway of my bedroom, with the only light being that from the Japanese rice paper lamp on my nightstand. This is why I appear so very orange. |
It's funny that Ian was able to get a photo of me with my mouth closed that night, because I was sitting there singing Franz Ferdinand's "Jacqueline" the entire time he was taking photos, specifically the line I'm so drunk I don't mind if you kill me. It was that kind of night.
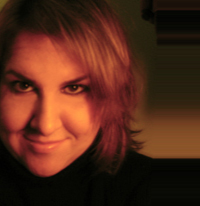
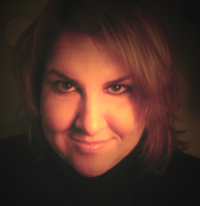
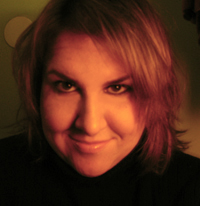 | Here's the photo after I've used the Image Adjustment tools to tweak the saturation of the colors and add more yellow to the image. Now the skin tone/hair color is closer to being lifelike, although the lighting is still "warm." |
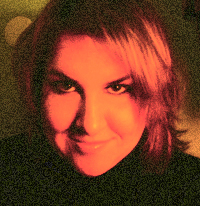 | This photo shows the Film Grain artistic filter layered over the color-corrected version above. According to my Photoshop Elements manual, this filter "applies an even pattern to the shadow tones and midtones of an image. A smoother, more saturated pattern is added to the image's lighter areas." I just think this filter looks cool. |
 | This is the original photo with a Film Grain filter and the Horizontal Color effect. Keep in mind that all of these filters/effects modify a photo with one click, but they're really preprogrammed "recipes" made up of multiple basic commands (i.e. brighten, add noise, change contrast, etc.). This is just another effect that I think looks really cool, even if I can't think of an actual purpose for it. |
 | Here I've used the Shear distortion filter to move the center of the color-corrected photo to the left. Normally you use the Shear filter to bend the photo along a curve - I initially had my face bent into an S-shape, but it was too scary to leave like that. So I just used it to move myself over, then had the pixels on the left side of the image wrapped around to the right. To me this looks like an album cover. |
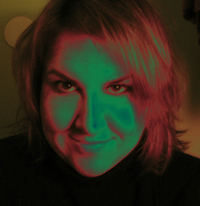 | Look! I'm the green dancing chick from Star Trek! This is the Solarize filter, which "blends a negative and a positive image - similar to exposing a photographic print briefly to light during development." Okay then. Good to know. |
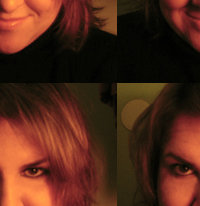 | This is new in PSE 3 - the Offset Quad effect. This shows the default settings of the effect, but you can tweak both the horizontal and vertical splits of the image, as we will see in the next photo... |
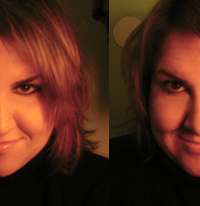 | In this photo I changed the horizontal percentage to 0, which resulted in no horizontal split of the photo. I also tried to adjust the vertical setting so that it would render as a perfect split of my face into right and left halves, because I think it's kind of cool to see how our faces, in some ways, are not perfectly symmetrical. |
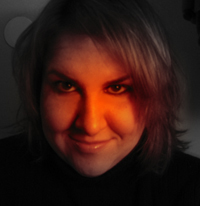 | Here's the Center Color effect, which is also new in PSE 3. It seems to be similar to the Horizontal Color effect shown earlier. The difference in this one is that I've used the color-corrected photo with no Film Grain filter added; for some reason, though, the color in the center of this photo is much redder than it is in my source, so this effect is adding saturation in the middle. |
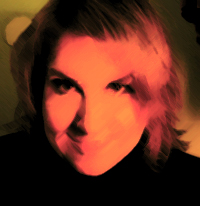
 | This is sort of similar to the previous photo, although this one has been adjusted using the Lighting Styles filter, specifically a Soft Omni light. I have no idea what that means, really, other than it appears to lighten up the center of the photo and darken the background. I was actually able to move the lighting around on the image and simply placed it right in the center; you can place it anywhere you want. There are about a bazillion lighting styles in PSE and I have no idea what you can accomplish with most of them. |
 | This is the Dark Strokes artistic filter used on the color-corrected image. Interesting, eh? This is another one that's new in PSE 3 so I don't know what exactly is being accomplished with this filter, or why you'd want to use it (other than being geeky and spending hours experimenting with various filters in PSE, but only really weird people ever do that). |
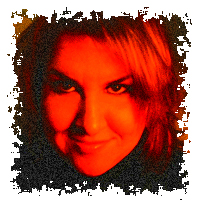 | With one click you can rip the edges of your images. This is the Spatter Frame effect used on the original photo that has had a Film Grain filter added to it. As you can see, I'm a fan of the Film Grain. |
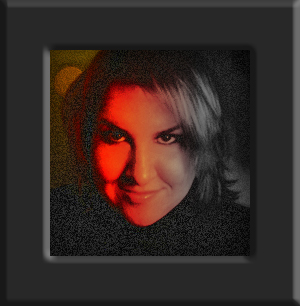 | Okay, this is ... (takes deep breath) ... the original image with Film Grain, Horizontal Color, and the Foreground Color effect added last. The Foreground Color effect lets you frame your image with the color of your choosing. I used a dark grey that I picked out of the right side of the image using the Eyedropper tool. |
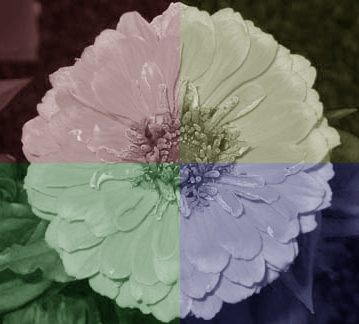 | This is the Quad Color effect, which I'm showing on a photo of a pink flower that I took in Michigan, because the effect wasn't as interesting looking on a photo of me. Basically this effect does exactly what it looks like - it renders the original in greyscale, then cuts it into four equal quadrants and layers color over each one (I'd say the opacity of the colors is around 50%, so you get a sepia-tone kind of effect, only not in amber). |
Posted by Highwaygirl on December 26, 2004 09:31 PM
to the category Geek Love
Ok, you've convinced me, I'm going to look into purchasing this for my workplace.
Kat, it's not even that expensive - just $65 after rebate on Amazon.com. After watching a few videos on the Photoshop Elements User website, I'm ready to order.